DIY Cup Holder Lights
#1
 08-06-2012, 09:00 AM


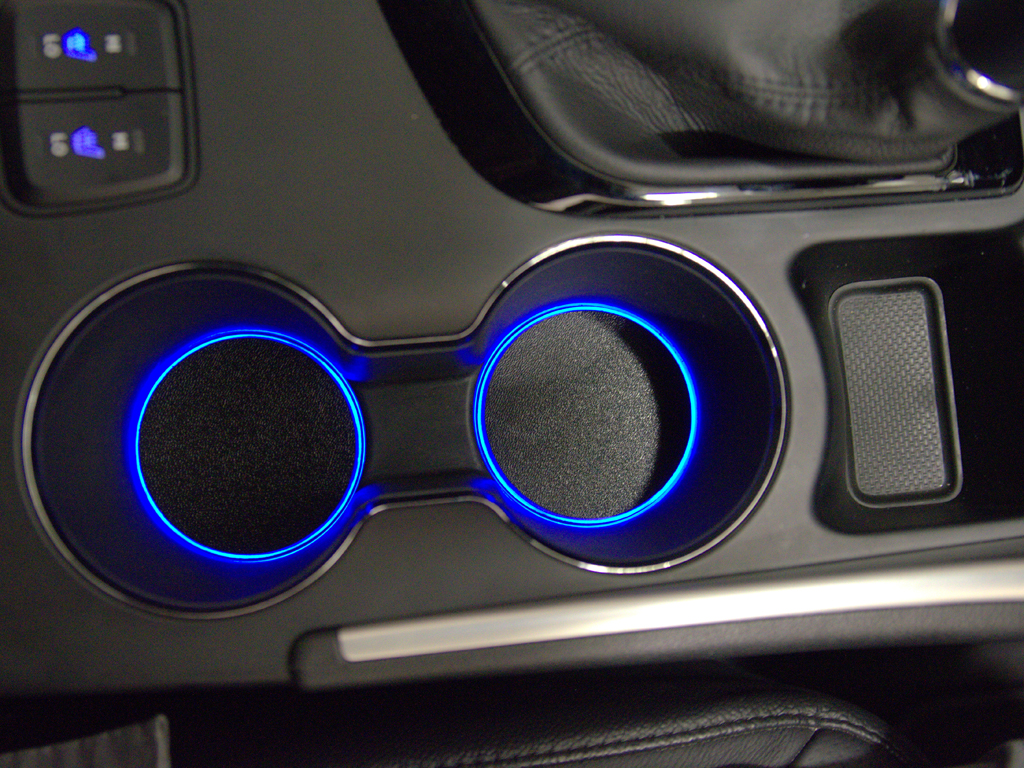
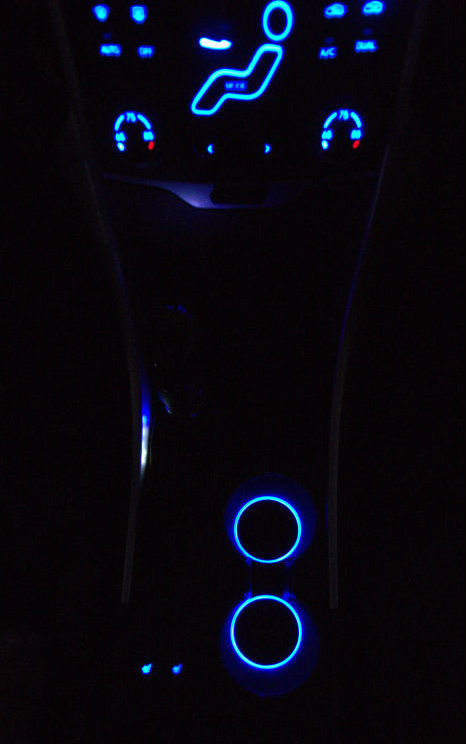
I created this mod originally as more of a functional mod than a fashion one, but it seems to work nicely for both. At night it was impossible to see where the cupholder holes were when placing drinks down, and I didnt want to scratch the center console so I decided to build my own. The goal was to be able to see the cupholder spaces, match the interior lighting, turn on and off with the other interior illumination, and look good.
Shout out to Glenn L. for keeping this mod alive. I now produce these kits and can ship them out to you for you to install. It�s easy! PM me to order or email me!
I also made a YouTube video detailing the entire process!!

Installation Instructions
2011+up Hyundai Sonata (all trims)
You may need the following tools:
� Plastic panel popper tool
� Small Flathead Screwdriver
� 3/16� Drill Bit (or larger)
� Silicone, Clear or Black
� Razor Blade
� Wire Strippers (I use something similar to the Irwin 2078300)
� Soldering Iron or another wire attachment technique (see end of instructions)
Disassembly:
-Begin by pulling off the silver-trimmed side panels on each side of the center console (highlighted in B). Start near the end nearest to the back of the car (A) and use a plastic panel popper or your hands to carefully pry up (B1), then the panel will pull backwards towards the rear (B2).
A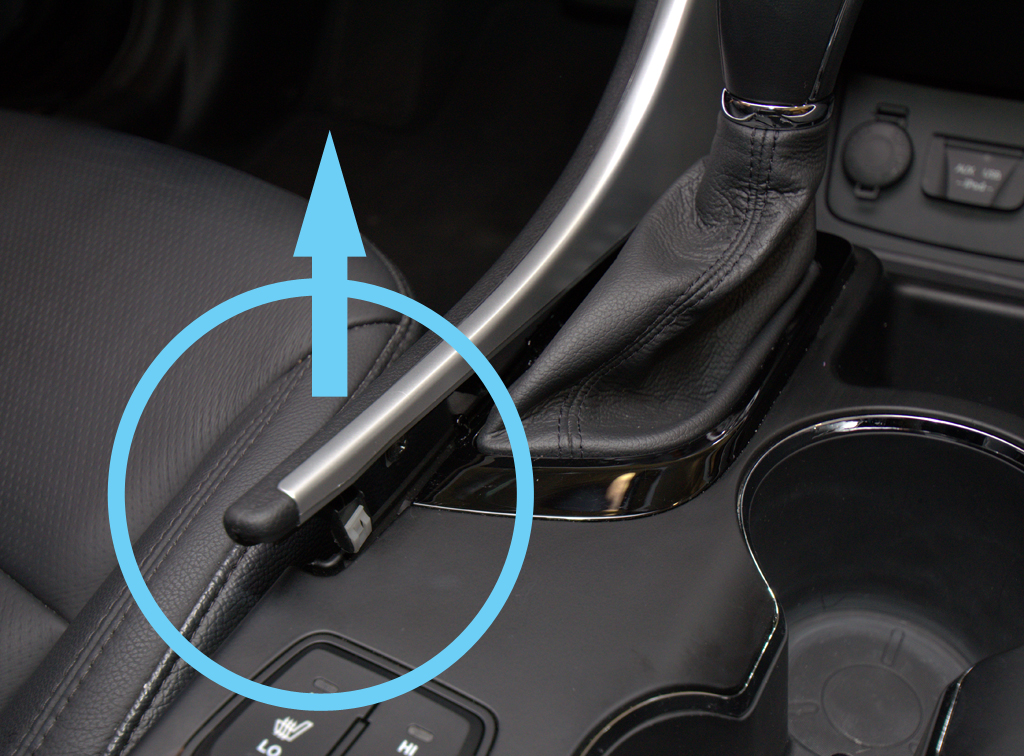
B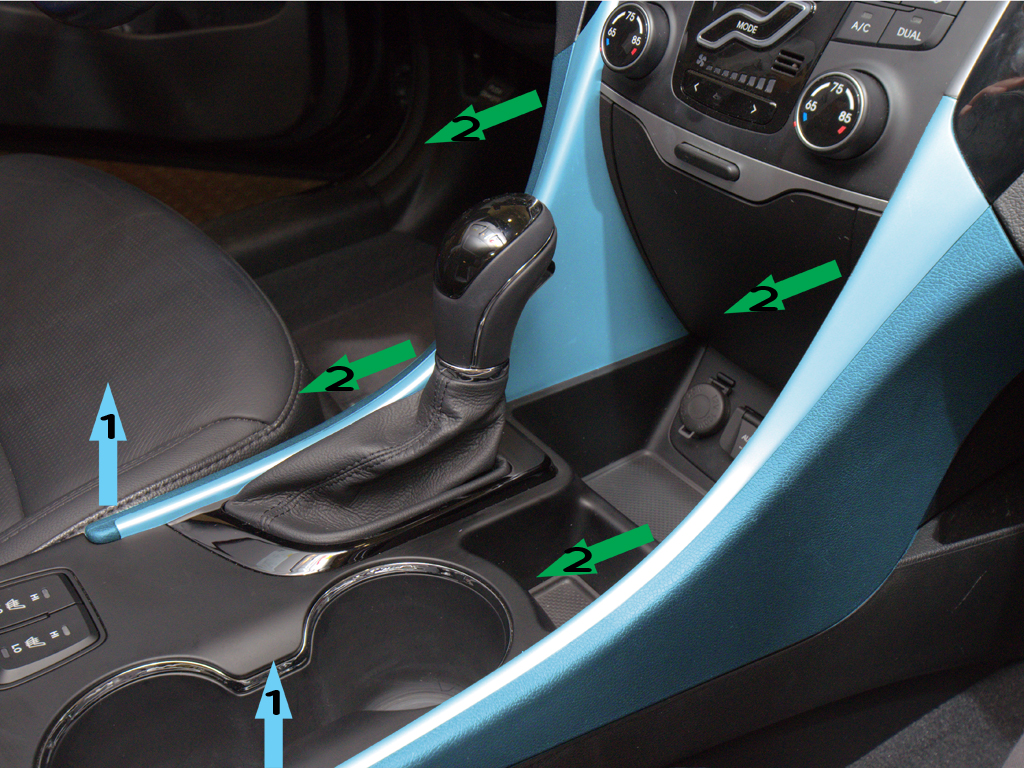
C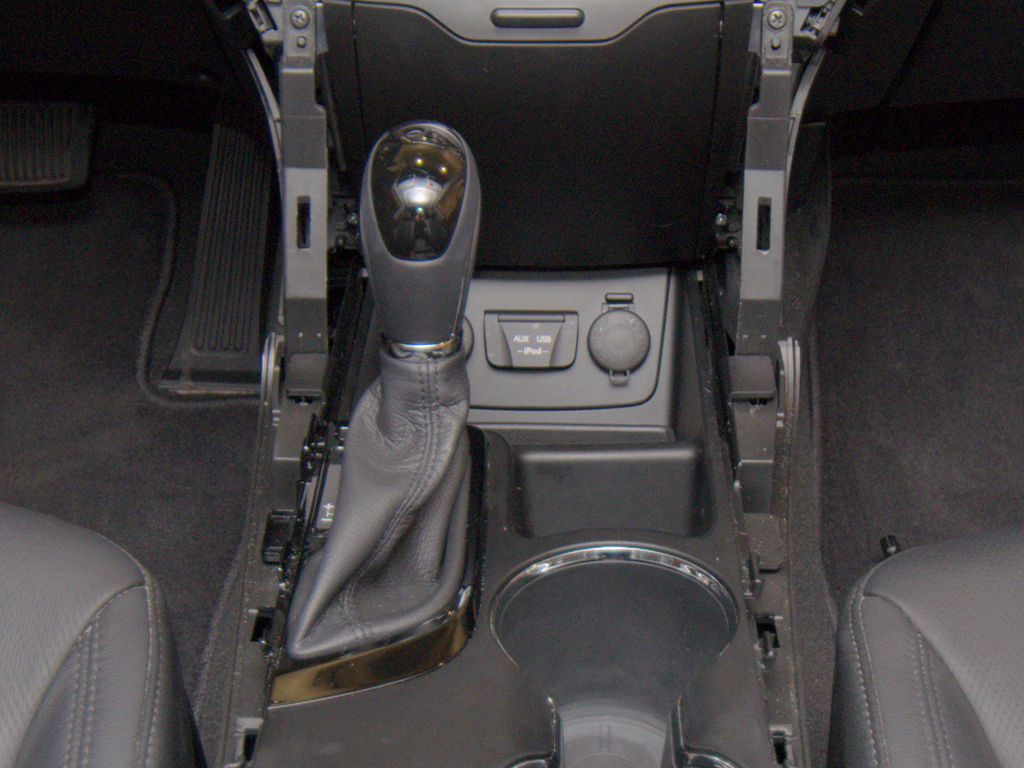
-Depress the parking brake and move the shift level to the �N� position (you can do this by turning on the key �not starting the vehicle, or by using the small flathead screwdriver to lift the shift lock cover and press the button inside to allow the shifter to move without the key on) (D). You must then pull up on the shifter handle, a force of 50lbs or more may be required, and the shifter and the leather boot will lift off (E).
D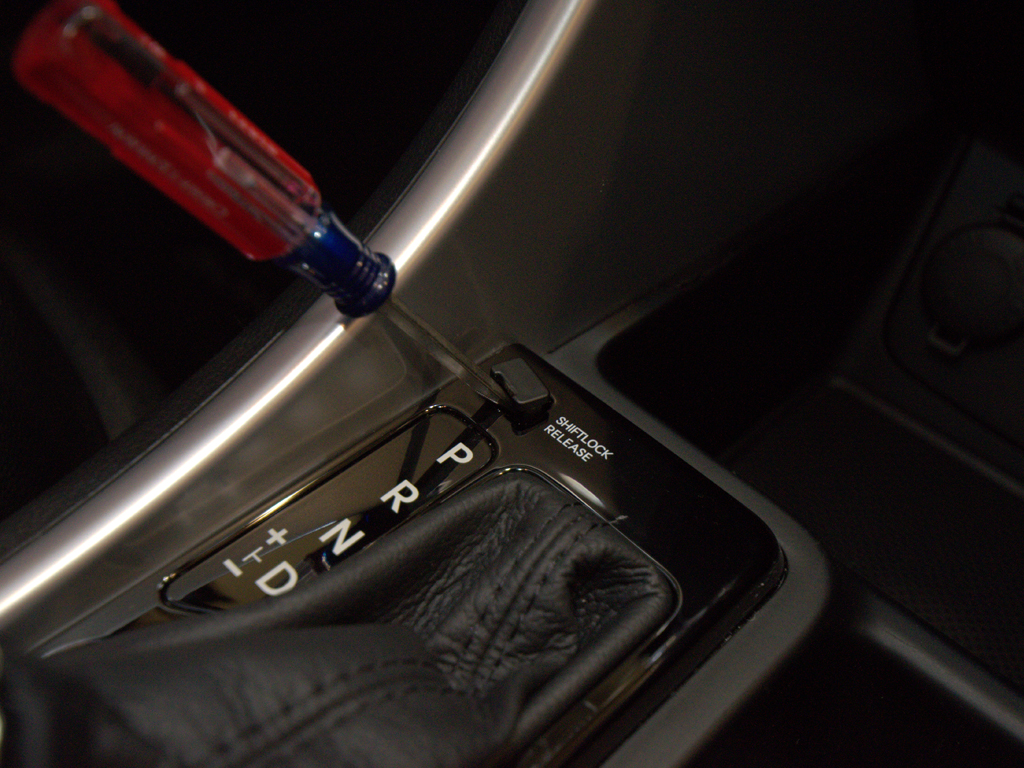
E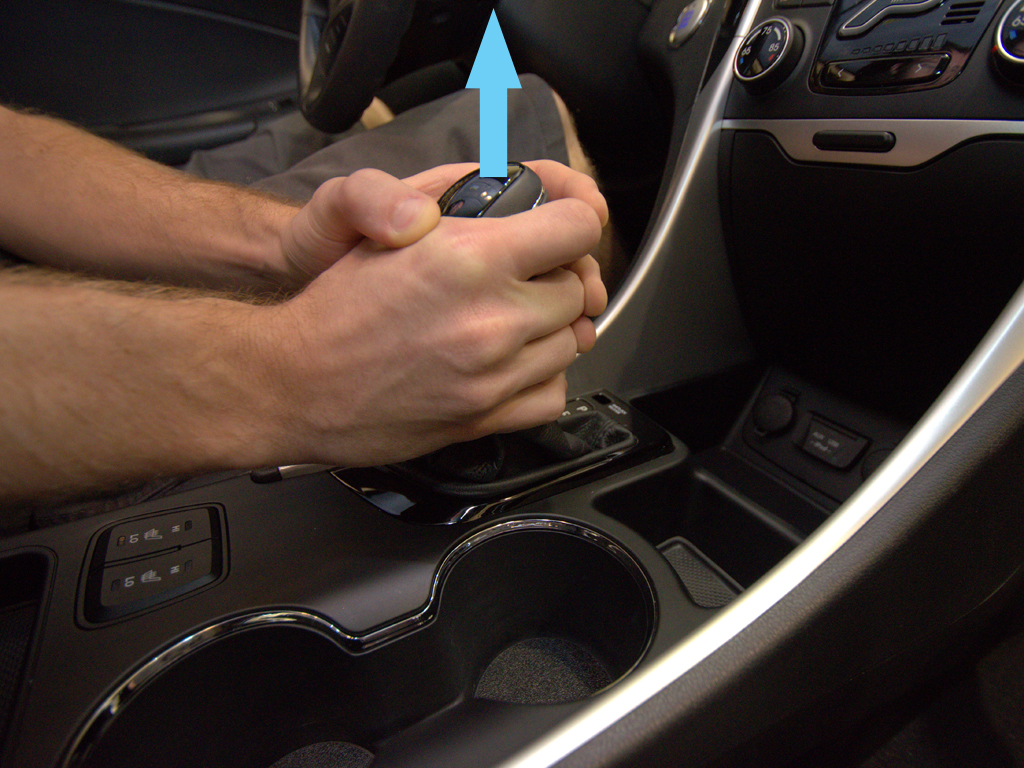
-The entire center piece from in front of the center console armrest pocket to the power outlets and aux jack is one single piece. (F) Open the center console armrest pocket and use your pry tool or your hands to begin lifting the center piece with the cup holders up (G). Once you get to the shifter that front piece including the power outlets and aux jack will pull forwards. Carefully lift up the piece and unplug the seat heaters (if available) (G) by depressing the tab on each side of the plug and then flip over and unplug the large white 26-pin plug attached to the power outlets and aux/USB jacks (I). Lift up and place the center console on a work bench.
F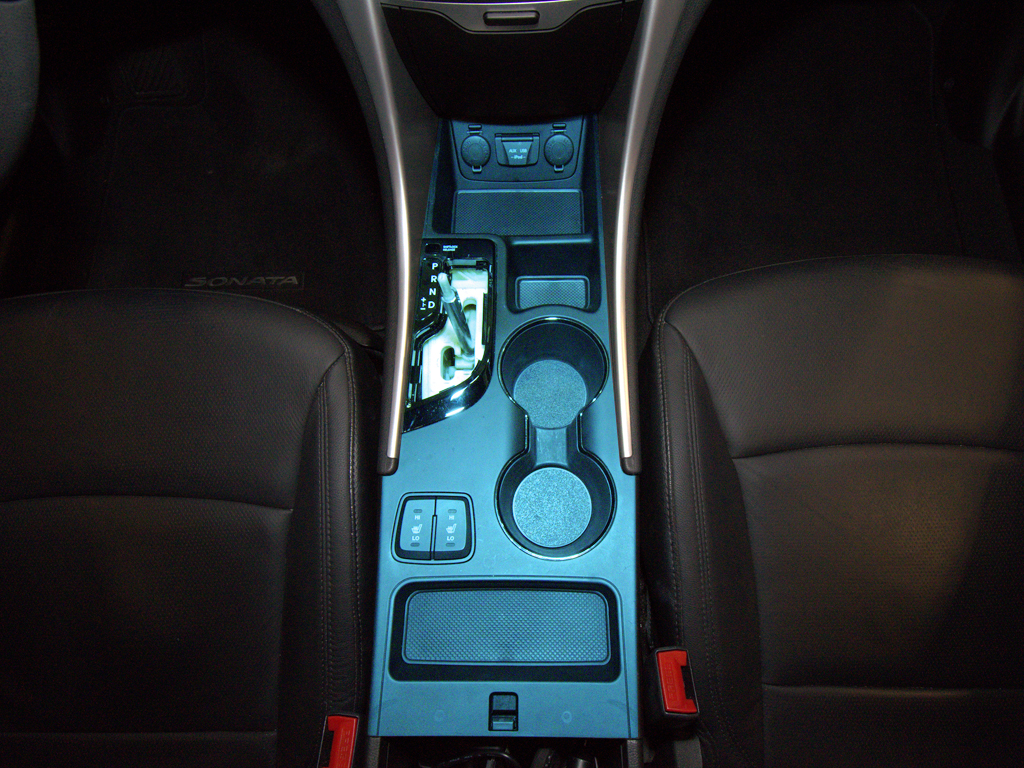
G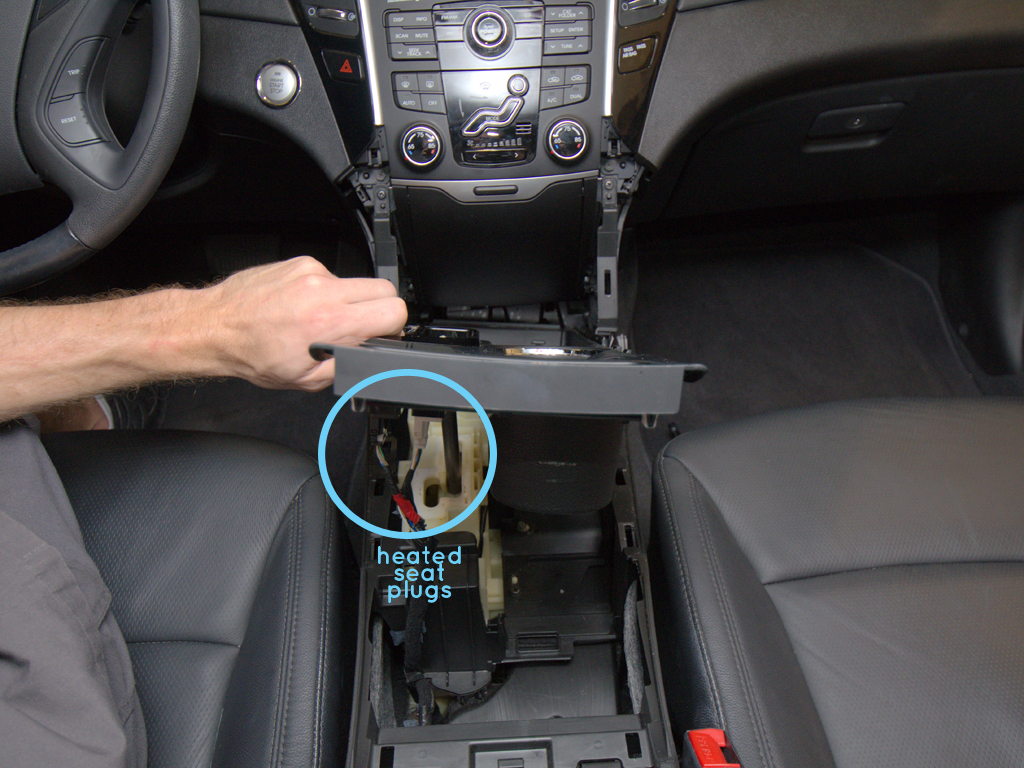
I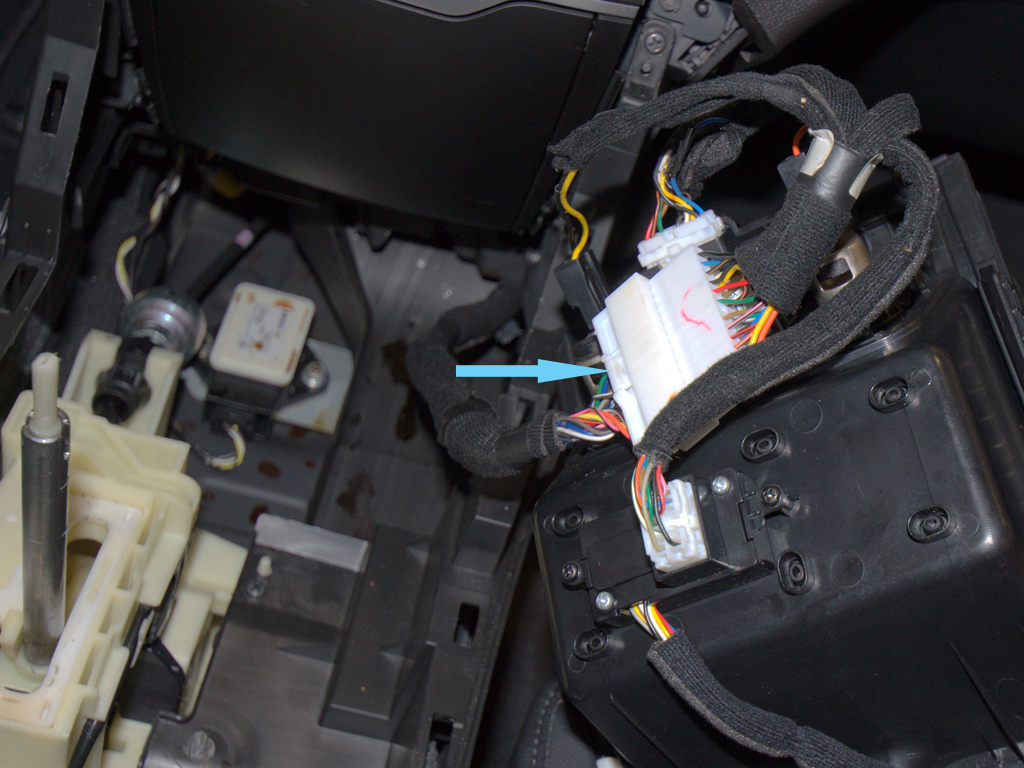
Installation:
-First thoroughly clean inside each cup holder with an alcohol pad or similar de-greaser. Drill a 3/16� hole from the top of the center console slightly off center in each cup holder (so we don�t have to bend the LED wire as much as if it were a centered hole). The actual holes drilled in the pictures are almost too close to the sides, use the indicated better hole placement (K).
K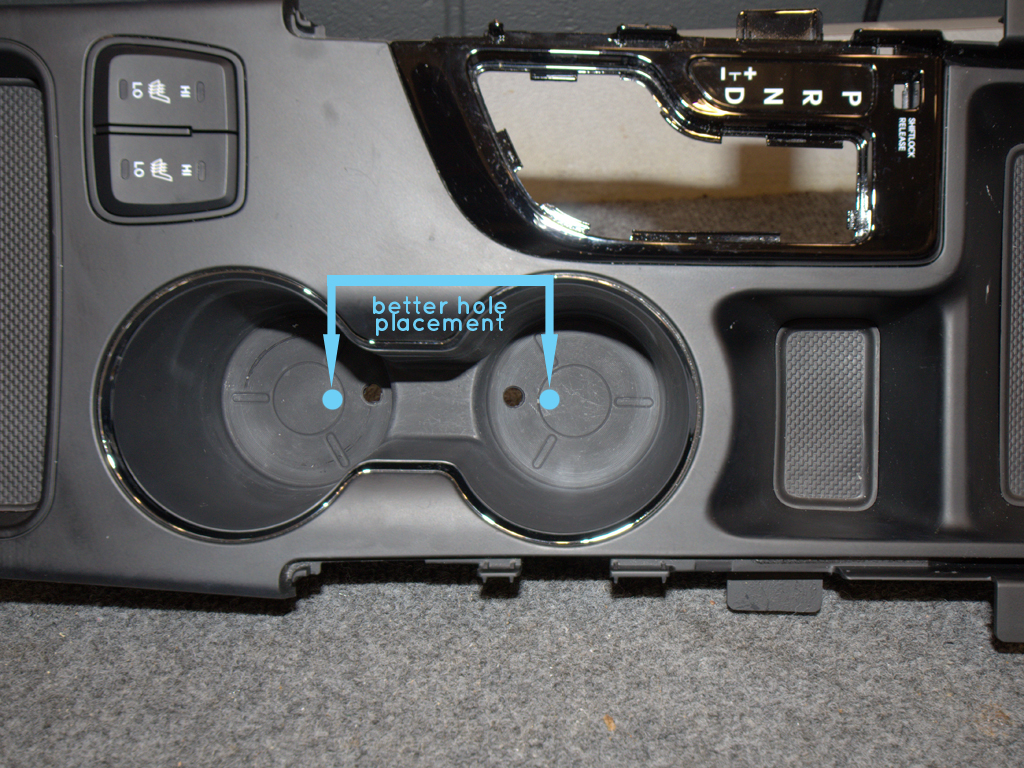
-Run the LED wire through each hole and remove the covering from the double-sided tape on the back of each cup holder disc. Route the wire through each hole and place the disc down into the cup holder but do not press down yet, carefully center each disc and then press down firmly to secure.
L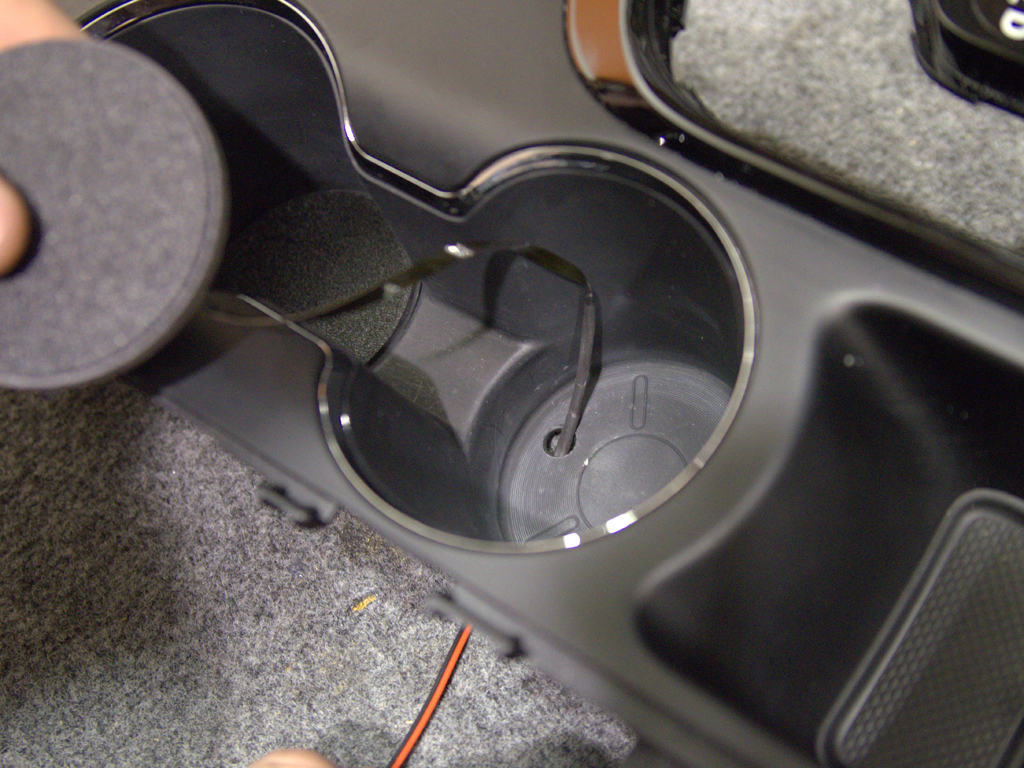
-Flip the console upside down and dab some silicone into the hole that was drilled. This step is not necessary as next to no spills or condensation will make it down into the cup holder, but some people like the extra precaution. Next we are going to run the wires towards the front of the console to where the plugs for the power outlets and aux/USB jacks are. Use zip ties as needed keeping wires from hanging loose.
M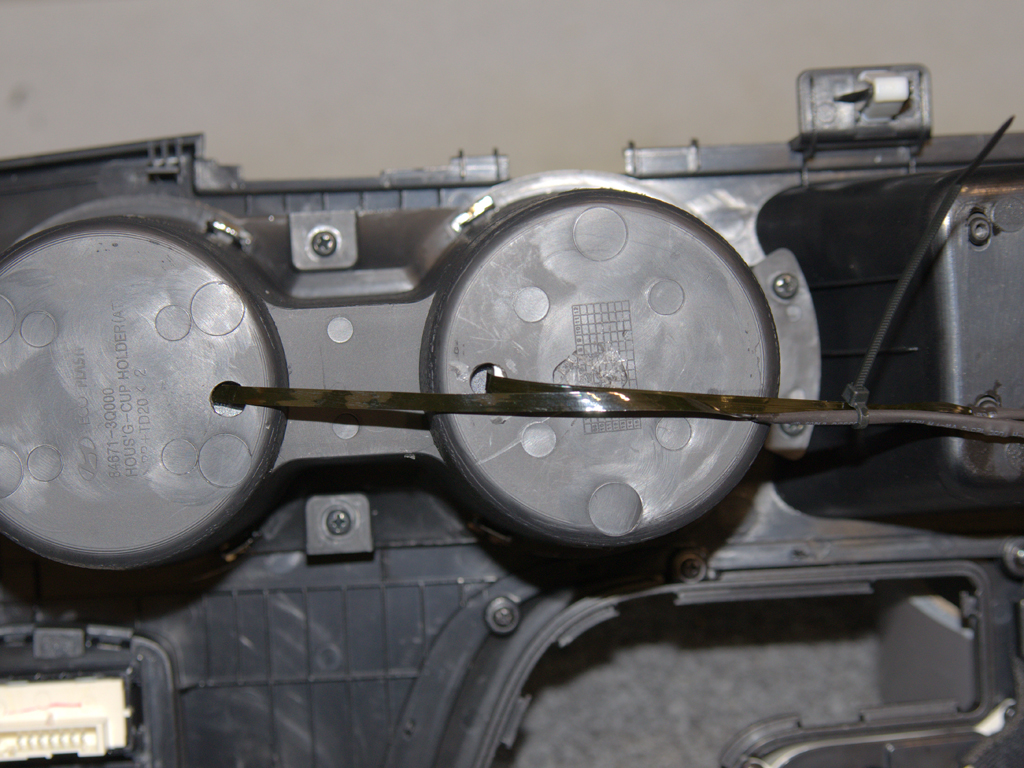
N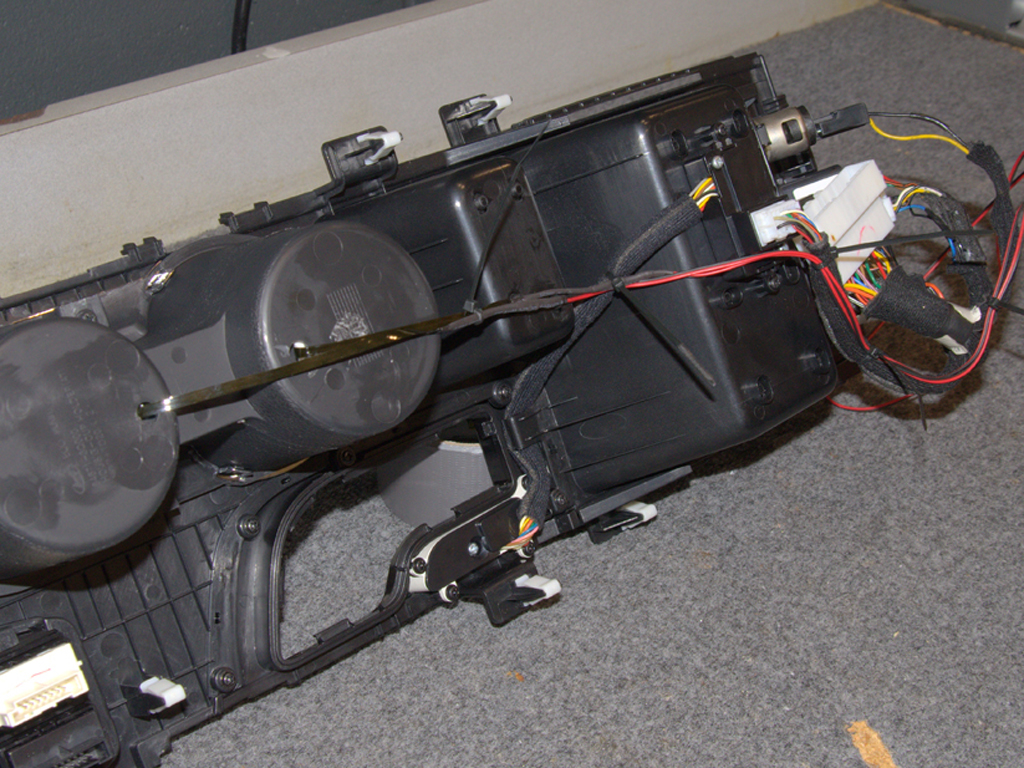
-Now we are going to wire in the power and ground for the LEDs. We need to use the power outlet plug with the yellow and black wires, and the white 16-pin plug going to the aux/USB (12-pin on navigation models). Take your razor blade and carefully cut back the fuzzy black covering on the wires going to the white 16-pin plug (12-pin on navigation models) and the power outlet with the yellow and black wires, so we can reach the wires. We will be using the black wire from the 2-pin power outlet plug and the blue wire (pin 8 on end) from the 16-pin plug (blue wire on the navigation models as well, but pin 6 on 12-pin connector not pictured. Pin 6 is on different end than pictured) (P).
P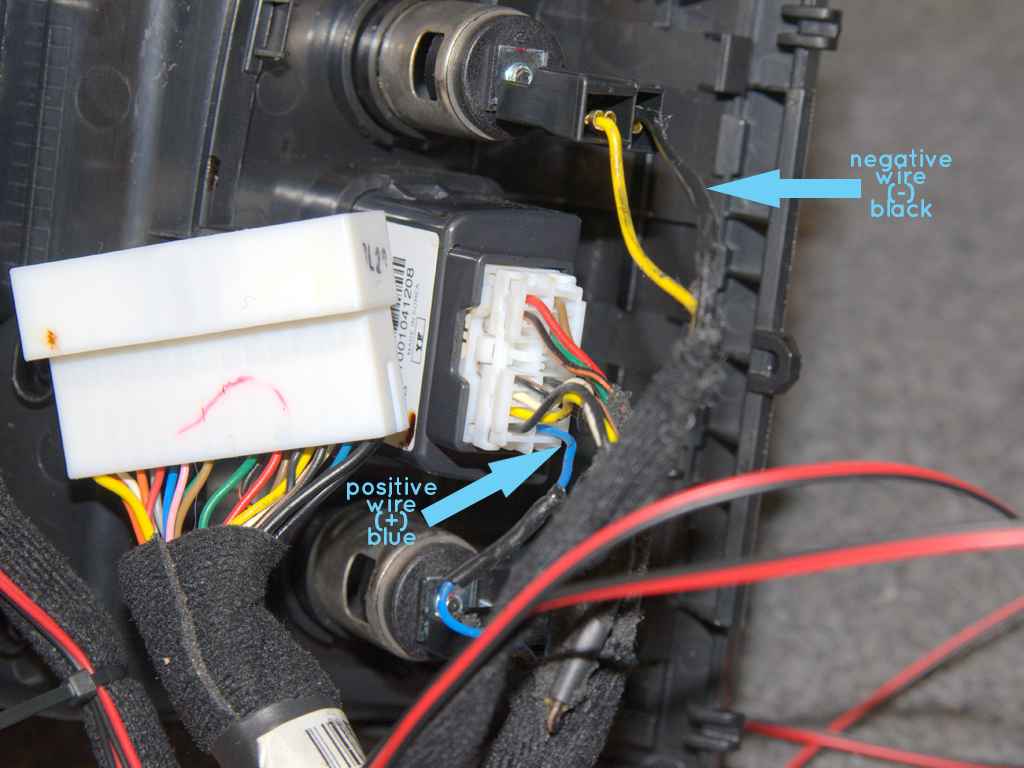
-(Alternate wire attachment methods described at end of instructions) Now use wire strippers to side-strip both the black wire going to the power outlet plug and the blue wire in the 16-pin plug (12-pin on navigation models). Run both black wires to that black car wire and both red wires to the blue car wire. Strip back the LED wires, and then poke a hole through the center of both the black and blue car wires (Q). Take both black LED wires and twist them together and run them through the black car wire and wrap it around (R). Then solder them together. Tape up the connection and zip tie to secure (T). Do the same with the red LED wires attaching to the blue car wire (DISCLAIMER: A 1-3amp fuse is suggested in line with the red LED wires).
Q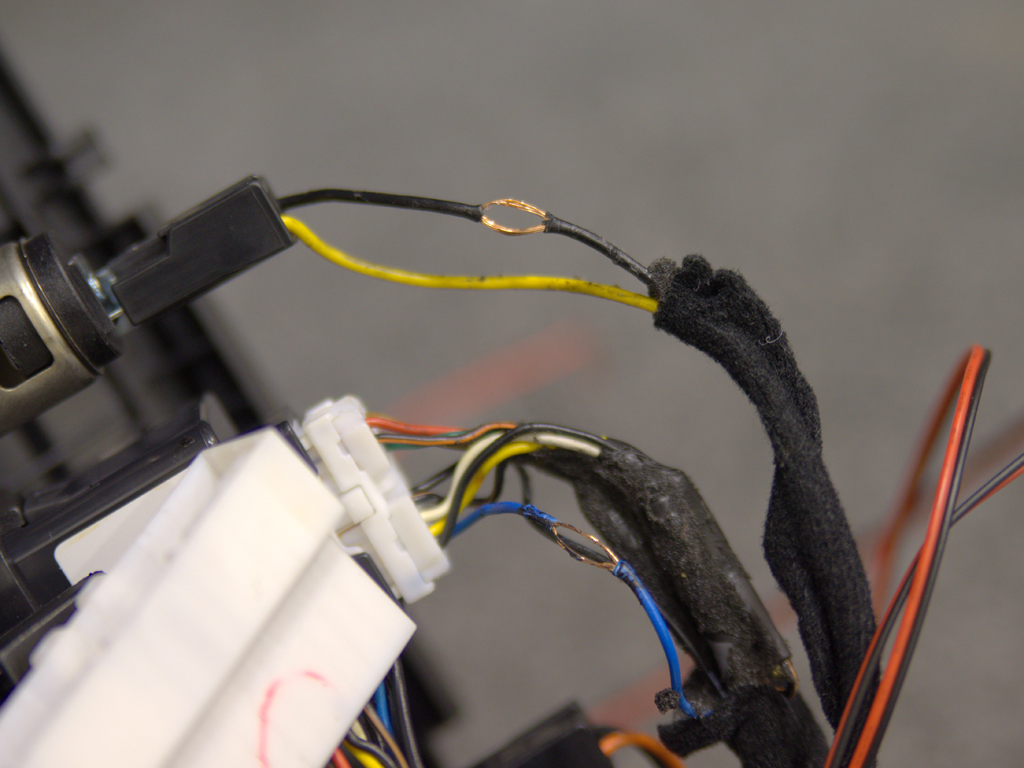
R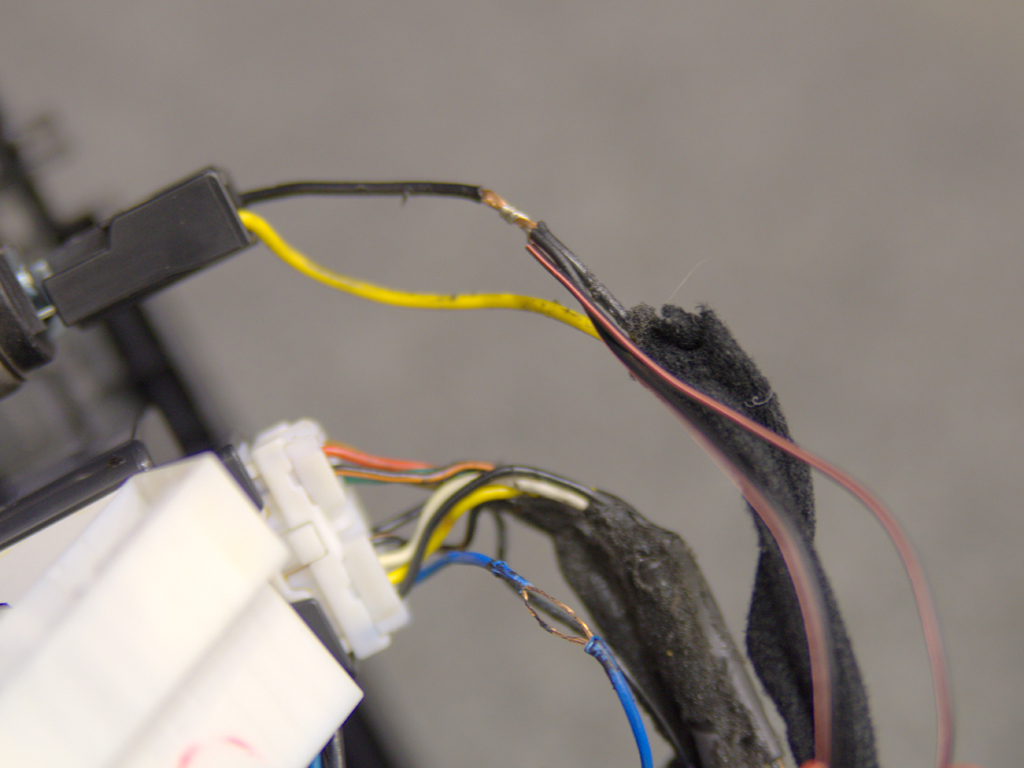
T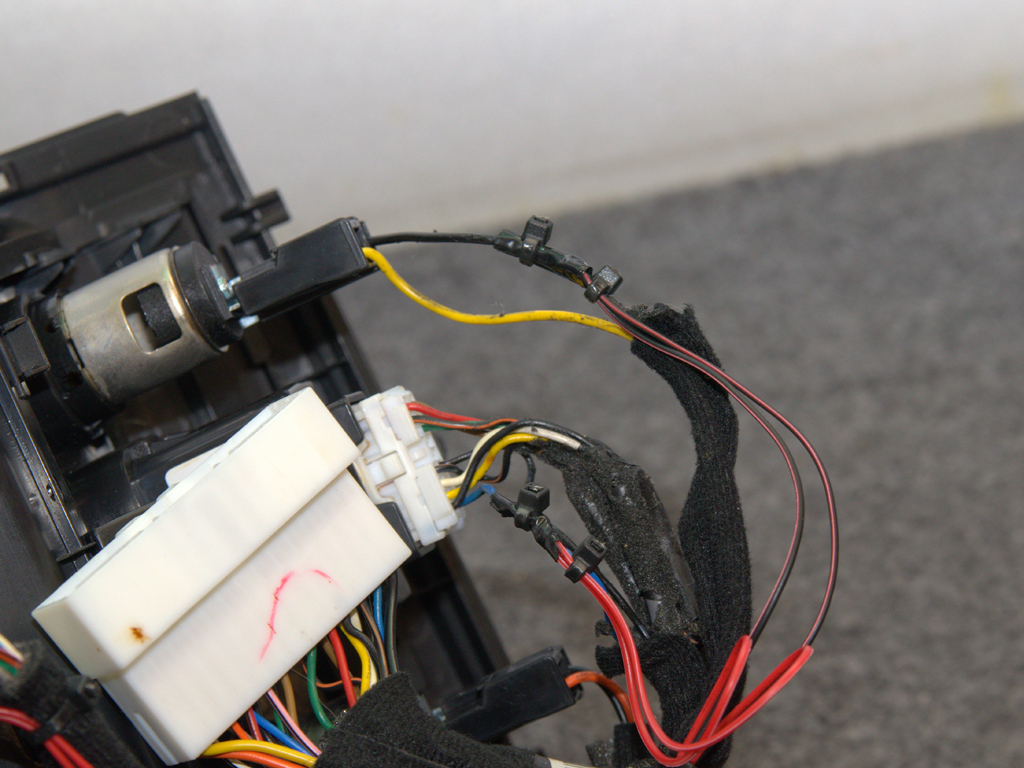
-Make sure all of your wiring is secure and all exposed connections are covered and secured.
U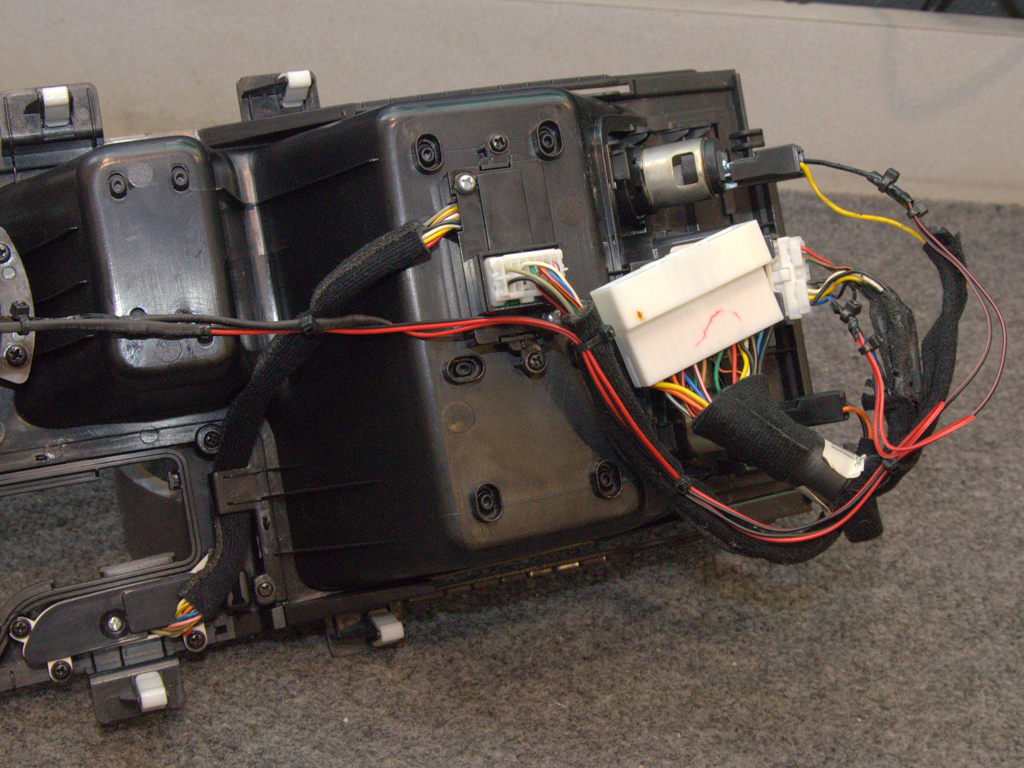
-Plug back in and replace the center console in the car (don�t forget the seat heaters) and turn on your headlights to test the LEDs. The remainder of the reinstall is the opposite of uninstall!
Alternate Wire Attachment Methods:
DISCLAIMER: Solder and tape is the most secure electrical connection, other methods described here are available for consumer convenience but will not be as secure of an electrical connection. Use at your own risk.
Option 1: Solder and Tape as described above
Option 2: Use the same technique without solder. Strip back wire with wire strippers and then just loop LED wires through car wire and tape, then secure with zip tie. This is sometimes called a �military splice� and is a perfectly acceptable way to install this particular wiring, if you tug on the wire the zip tie takes the pressure off of the actual connection, and the tape secures the connection itself.
Option 3: Scotch-Locks or �T-Taps�. These types of electrical connectors are very easy to use, and the amount of current going through them in this scenario is very small, but the problem arises with the electrical connection itself and whether or not the �T-Tap� successfully pierces the wire and then secures it. Problems can arise where the wire is broken by the �T-Tap� or the electrical connection becomes loose. This wire connection type is not recommended but can be used in a last resort by a consumer without access to wire strippers.
Shout out to Glenn L. for keeping this mod alive. I now produce these kits and can ship them out to you for you to install. It�s easy! PM me to order or email me!
I also made a YouTube video detailing the entire process!!
Installation Instructions
2011+up Hyundai Sonata (all trims)
You may need the following tools:
� Plastic panel popper tool
� Small Flathead Screwdriver
� 3/16� Drill Bit (or larger)
� Silicone, Clear or Black
� Razor Blade
� Wire Strippers (I use something similar to the Irwin 2078300)
� Soldering Iron or another wire attachment technique (see end of instructions)
Disassembly:
-Begin by pulling off the silver-trimmed side panels on each side of the center console (highlighted in B). Start near the end nearest to the back of the car (A) and use a plastic panel popper or your hands to carefully pry up (B1), then the panel will pull backwards towards the rear (B2).
A
B
C
-Depress the parking brake and move the shift level to the �N� position (you can do this by turning on the key �not starting the vehicle, or by using the small flathead screwdriver to lift the shift lock cover and press the button inside to allow the shifter to move without the key on) (D). You must then pull up on the shifter handle, a force of 50lbs or more may be required, and the shifter and the leather boot will lift off (E).
D
E
-The entire center piece from in front of the center console armrest pocket to the power outlets and aux jack is one single piece. (F) Open the center console armrest pocket and use your pry tool or your hands to begin lifting the center piece with the cup holders up (G). Once you get to the shifter that front piece including the power outlets and aux jack will pull forwards. Carefully lift up the piece and unplug the seat heaters (if available) (G) by depressing the tab on each side of the plug and then flip over and unplug the large white 26-pin plug attached to the power outlets and aux/USB jacks (I). Lift up and place the center console on a work bench.
F
G
I
Installation:
-First thoroughly clean inside each cup holder with an alcohol pad or similar de-greaser. Drill a 3/16� hole from the top of the center console slightly off center in each cup holder (so we don�t have to bend the LED wire as much as if it were a centered hole). The actual holes drilled in the pictures are almost too close to the sides, use the indicated better hole placement (K).
K
-Run the LED wire through each hole and remove the covering from the double-sided tape on the back of each cup holder disc. Route the wire through each hole and place the disc down into the cup holder but do not press down yet, carefully center each disc and then press down firmly to secure.
L
-Flip the console upside down and dab some silicone into the hole that was drilled. This step is not necessary as next to no spills or condensation will make it down into the cup holder, but some people like the extra precaution. Next we are going to run the wires towards the front of the console to where the plugs for the power outlets and aux/USB jacks are. Use zip ties as needed keeping wires from hanging loose.
M
N
-Now we are going to wire in the power and ground for the LEDs. We need to use the power outlet plug with the yellow and black wires, and the white 16-pin plug going to the aux/USB (12-pin on navigation models). Take your razor blade and carefully cut back the fuzzy black covering on the wires going to the white 16-pin plug (12-pin on navigation models) and the power outlet with the yellow and black wires, so we can reach the wires. We will be using the black wire from the 2-pin power outlet plug and the blue wire (pin 8 on end) from the 16-pin plug (blue wire on the navigation models as well, but pin 6 on 12-pin connector not pictured. Pin 6 is on different end than pictured) (P).
P
-(Alternate wire attachment methods described at end of instructions) Now use wire strippers to side-strip both the black wire going to the power outlet plug and the blue wire in the 16-pin plug (12-pin on navigation models). Run both black wires to that black car wire and both red wires to the blue car wire. Strip back the LED wires, and then poke a hole through the center of both the black and blue car wires (Q). Take both black LED wires and twist them together and run them through the black car wire and wrap it around (R). Then solder them together. Tape up the connection and zip tie to secure (T). Do the same with the red LED wires attaching to the blue car wire (DISCLAIMER: A 1-3amp fuse is suggested in line with the red LED wires).
Q
R
T
-Make sure all of your wiring is secure and all exposed connections are covered and secured.
U
-Plug back in and replace the center console in the car (don�t forget the seat heaters) and turn on your headlights to test the LEDs. The remainder of the reinstall is the opposite of uninstall!
Alternate Wire Attachment Methods:
DISCLAIMER: Solder and tape is the most secure electrical connection, other methods described here are available for consumer convenience but will not be as secure of an electrical connection. Use at your own risk.
Option 1: Solder and Tape as described above
Option 2: Use the same technique without solder. Strip back wire with wire strippers and then just loop LED wires through car wire and tape, then secure with zip tie. This is sometimes called a �military splice� and is a perfectly acceptable way to install this particular wiring, if you tug on the wire the zip tie takes the pressure off of the actual connection, and the tape secures the connection itself.
Option 3: Scotch-Locks or �T-Taps�. These types of electrical connectors are very easy to use, and the amount of current going through them in this scenario is very small, but the problem arises with the electrical connection itself and whether or not the �T-Tap� successfully pierces the wire and then secures it. Problems can arise where the wire is broken by the �T-Tap� or the electrical connection becomes loose. This wire connection type is not recommended but can be used in a last resort by a consumer without access to wire strippers.

Thread
Thread Starter
Forum
Replies
Last Post