DIY Exhaust Replacement - G4CP (2000) Elantra Wagon GLS
#1
 08-03-2009, 01:14 AM


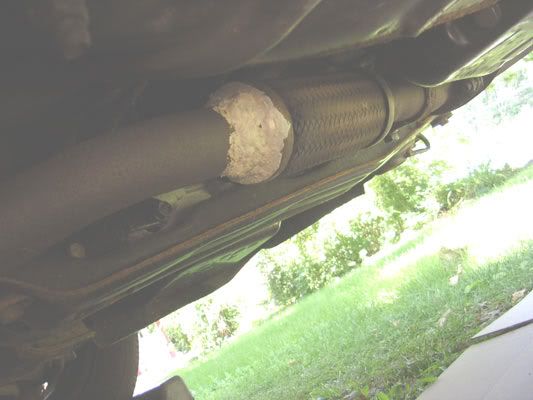
Our Elantra 2.0 GLS (station wagon) developed in the last 4 months a bad exhaust leak, and became increasingly noisy. I decided to inspect the exhaust and I found the Header (Flex) pipe being the culprit.
I initially tried to patch it up with some Exhaust System Joint and Crack Sealer (made by VersaChem), but it turned out that the "flex" section itself was cracked.
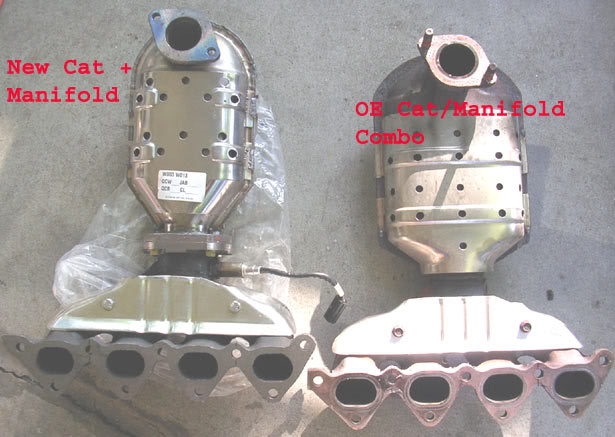
The car has 93,000 miles so I decided it's time for a new cat + manifold as well, since they were relatively non-prohibitive cost wise.
I ended up ordering the parts from RockAuto.com:
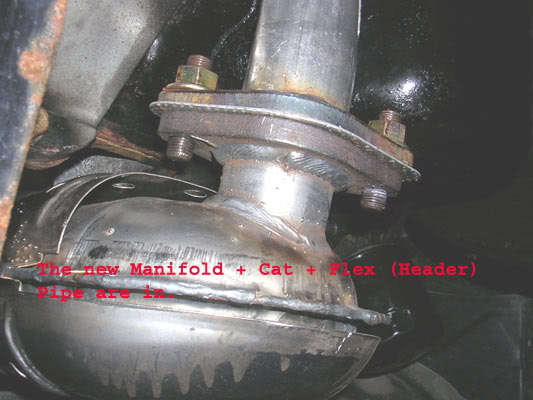
1) DORMAN Part # 674551 - Combined Manifold & Converter Assembly - $ 151.89

-
-
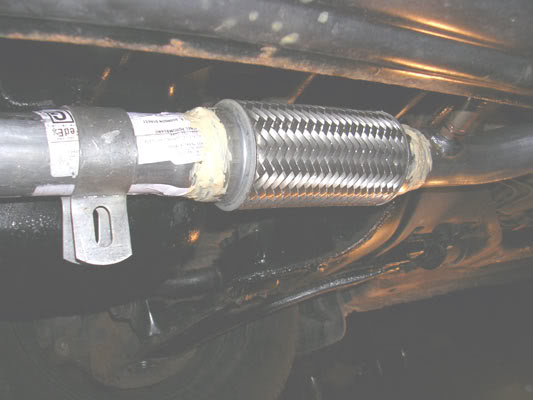
2) BOSAL Part # 751191 - Header (Flex) Pipe; Federal Emissions - $ 75.89

-
-
3) BOSAL Part # 288011 - Resonator (Intermediary) Pipe; Federal Emissions- $ 113.79

-
-
4) 2 x BOSAL Part # 256390 - Flange Gasket - 2 x 3.86 = $ 7.72

--
2 x BOSAL Part # 256398 - Flange Gasket - 2 x 2.79 = $ 5.58

--
--
The shipping was $ 32.86 for all these parts, and the total accounted for $ 387.73
-__________________________________________________ ______________________________-
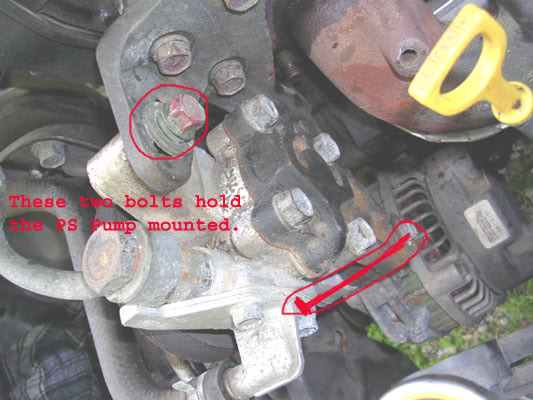
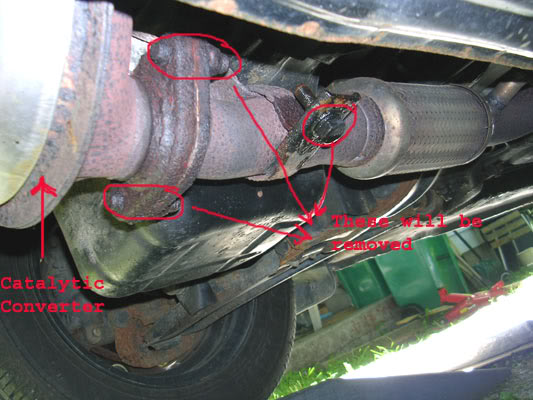
The replacement procedure is fairly simple: take the old parts out, get the new parts in. The main hurdles are getting the old rusted flange nuts removed and also getting the PSteering Pump bracket out of the way so the manifold can slide off the studs.
I started about 2-3 days before receiving the parts to get the exhaust and the manifold nuts soaked in PBlaster.
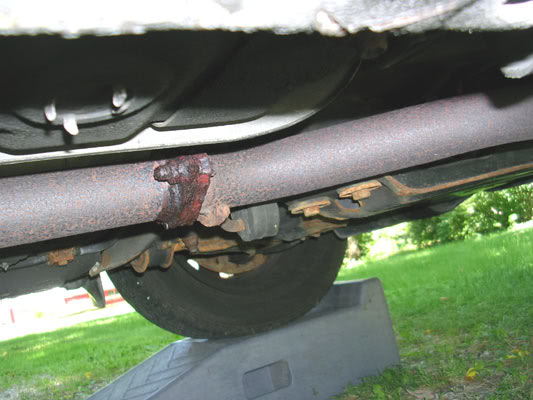
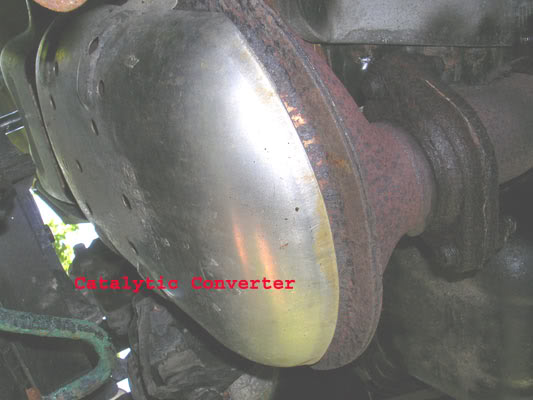
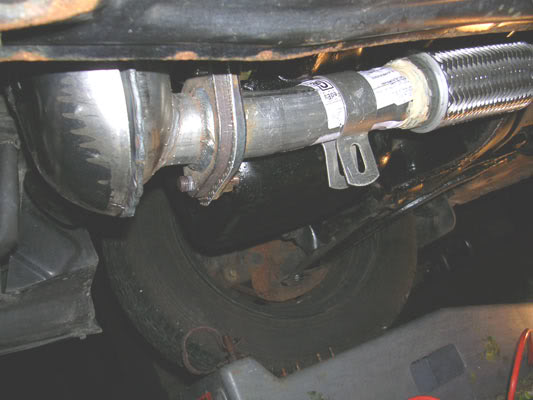
Here are some pics with the old exhaust:
--
--
OK, here we go:
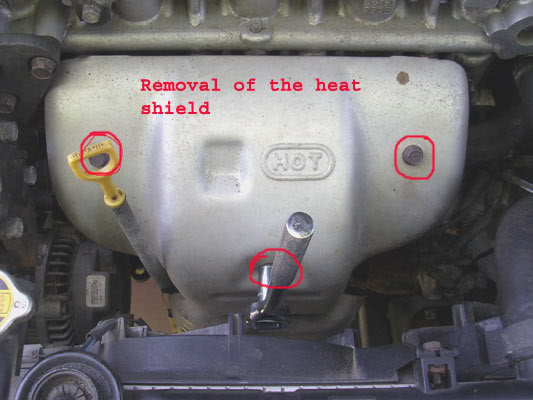
1) Remove the cat's heat shield, three bolts:
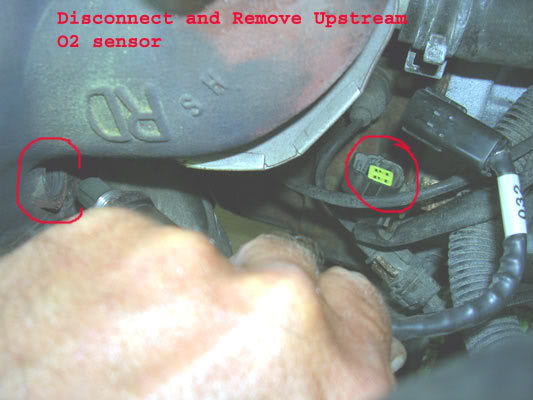
2) Disconnect and remove the upstream O2 sensor with a Lambda wrench

3) Now are at least two ways to tackle the next step, which is removing the Manifold + Cat. I started exactly with these two, thinking I can just drop them down and remove the whole exhaust in one piece.
It isn't a bad idea, especially if the flange nuts between the Cat and the flex pipe are extremely corroded from rust and you cannot unbolt them.
However, in retrospect I found out that probably it is better to separate the cat from the flex pipe, so that takes out any chance of nicking the manifold studs' threads from putting pressure on it. Even if cutting is involved, probabably this would be the "better" route.
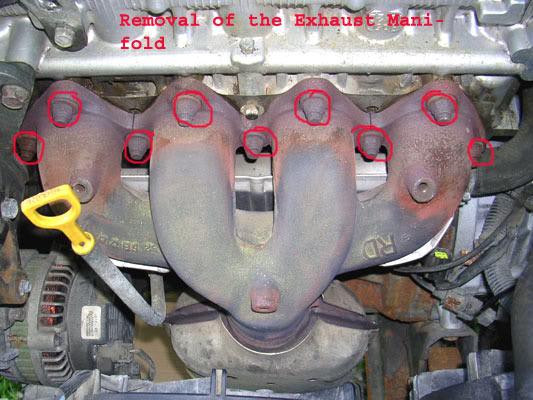
a) Anyway, I started removing the manifold nuts - 9 of them.
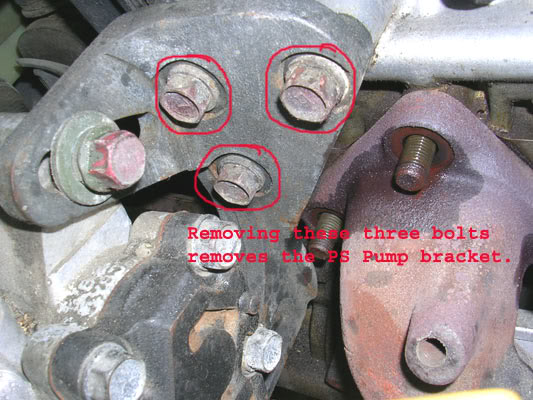
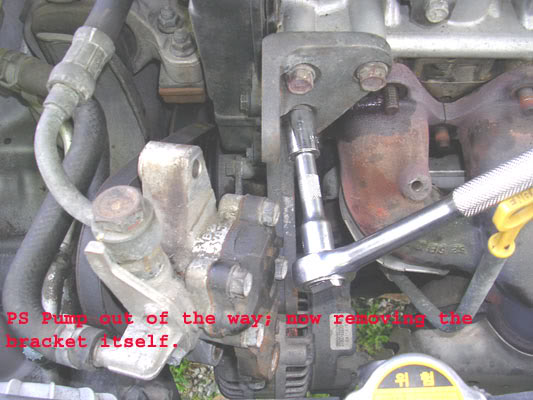
At this point, the manifold would not slide out unless the Power Steering Pump bracket is removed.
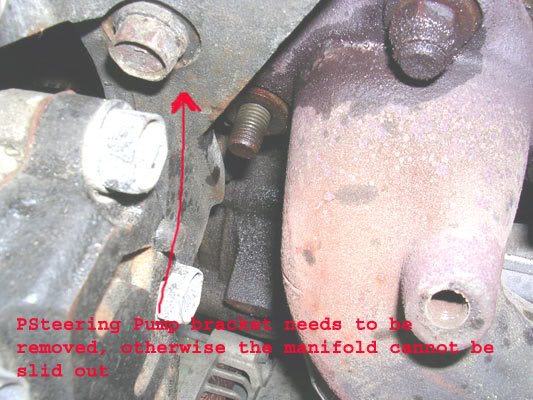
In any event, the accessory belt HAS to come off (loosened up) and the PS Pump moved out of the way, with or without bracket.
--
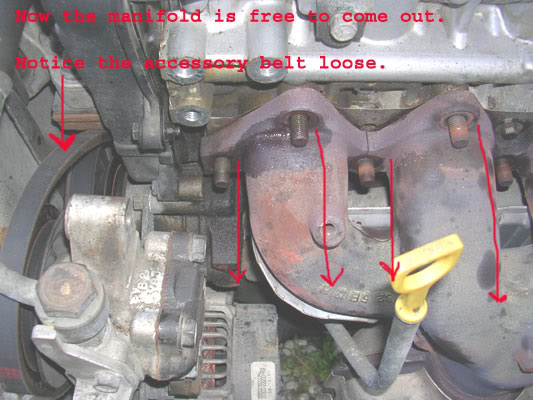
Now the manifold can slide out unobstructed.
--
By the way, if going this route first (to just drop the cat and manifold down, you have to also move the dipstick housing out of the way.
It only has one bolt fastening it to the engine block, and then you can turn it toward the PS Pump.
With a little jiggling and angling, you should be able to slide down the "two" parts in between the rad fans and the engine block.
I initially tried to patch it up with some Exhaust System Joint and Crack Sealer (made by VersaChem), but it turned out that the "flex" section itself was cracked.
The car has 93,000 miles so I decided it's time for a new cat + manifold as well, since they were relatively non-prohibitive cost wise.
I ended up ordering the parts from RockAuto.com:
1) DORMAN Part # 674551 - Combined Manifold & Converter Assembly - $ 151.89
-
-
2) BOSAL Part # 751191 - Header (Flex) Pipe; Federal Emissions - $ 75.89
-
-
3) BOSAL Part # 288011 - Resonator (Intermediary) Pipe; Federal Emissions- $ 113.79
-
-
4) 2 x BOSAL Part # 256390 - Flange Gasket - 2 x 3.86 = $ 7.72
--
2 x BOSAL Part # 256398 - Flange Gasket - 2 x 2.79 = $ 5.58
--
--
The shipping was $ 32.86 for all these parts, and the total accounted for $ 387.73
-__________________________________________________ ______________________________-
The replacement procedure is fairly simple: take the old parts out, get the new parts in. The main hurdles are getting the old rusted flange nuts removed and also getting the PSteering Pump bracket out of the way so the manifold can slide off the studs.
I started about 2-3 days before receiving the parts to get the exhaust and the manifold nuts soaked in PBlaster.
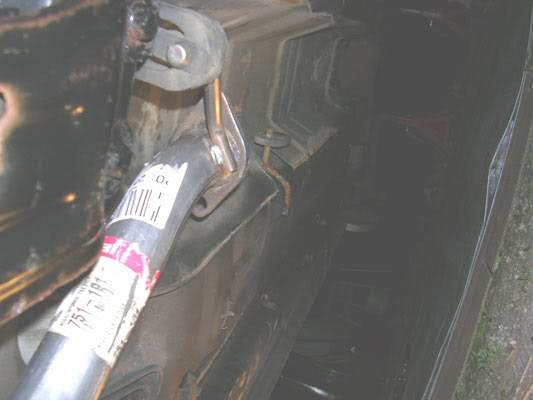
Here are some pics with the old exhaust:
--
--
OK, here we go:
1) Remove the cat's heat shield, three bolts:
2) Disconnect and remove the upstream O2 sensor with a Lambda wrench
3) Now are at least two ways to tackle the next step, which is removing the Manifold + Cat. I started exactly with these two, thinking I can just drop them down and remove the whole exhaust in one piece.
It isn't a bad idea, especially if the flange nuts between the Cat and the flex pipe are extremely corroded from rust and you cannot unbolt them.
However, in retrospect I found out that probably it is better to separate the cat from the flex pipe, so that takes out any chance of nicking the manifold studs' threads from putting pressure on it. Even if cutting is involved, probabably this would be the "better" route.
a) Anyway, I started removing the manifold nuts - 9 of them.
At this point, the manifold would not slide out unless the Power Steering Pump bracket is removed.
In any event, the accessory belt HAS to come off (loosened up) and the PS Pump moved out of the way, with or without bracket.
--
Now the manifold can slide out unobstructed.
--
By the way, if going this route first (to just drop the cat and manifold down, you have to also move the dipstick housing out of the way.
It only has one bolt fastening it to the engine block, and then you can turn it toward the PS Pump.
With a little jiggling and angling, you should be able to slide down the "two" parts in between the rad fans and the engine block.
Last edited by WillPartHyundai; 08-03-2009 at 01:26 AM.
#2
08-03-2009, 01:18 AM
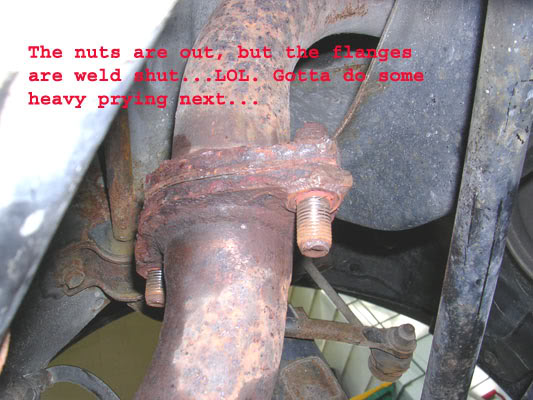
b) The second way, as said, is to separate first the Cat flange from the flex pipe.
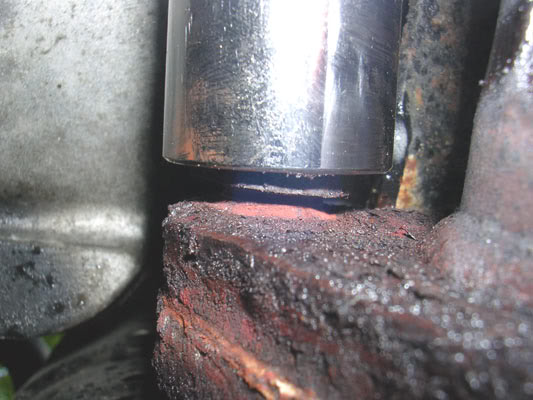
I was LUCKY, the two nuts didn't put out too much opposition so I was able to remove them:
--
I separated the Cat from the Flex pipe (with some prying involved as the two flanges were weld together due to rust), and dropped down (yepp, in between the radiator fans and engine block) the cat + manifold with some careful angling and tks to the PS Pump being out of the way:

--
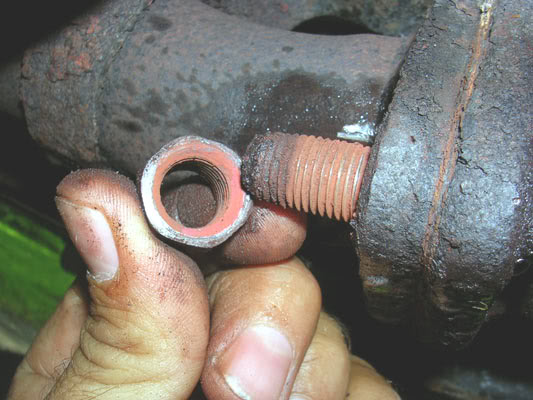
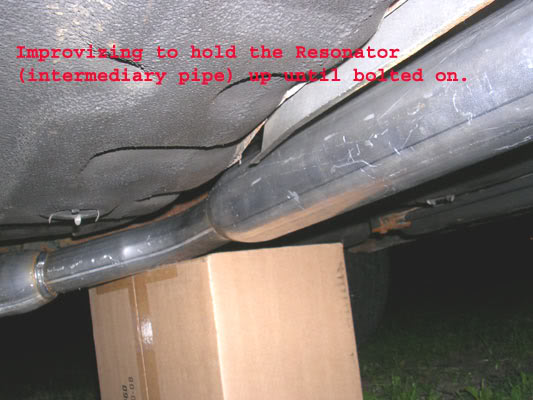
4) I didn't bother with the nuts connecting the flex pipe to the resonator (intermediary) pipe as it was too rusted, and concentrated directly on the Resonator-Muffler flange.
It really took 3-4 hours to wrestle those two nuts, as they were really rusted. Actually one of them from a 3/4 profile thinned out to about 5/8.... I broke a 5/8 6-point socket which I had to tap in to get a grip. I had to go to the store and get a 12-pt socket, which I didn't have.
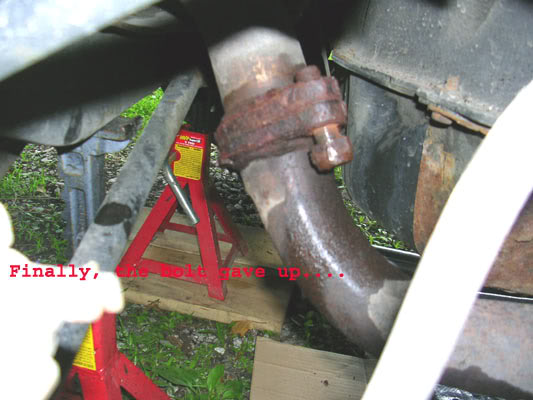
Finally, finally after so much wrestling (the position is also so difficult without having the car higher over your head) I was able to remove both bolts and drop the whole resonator-flex pipe assembly.
--
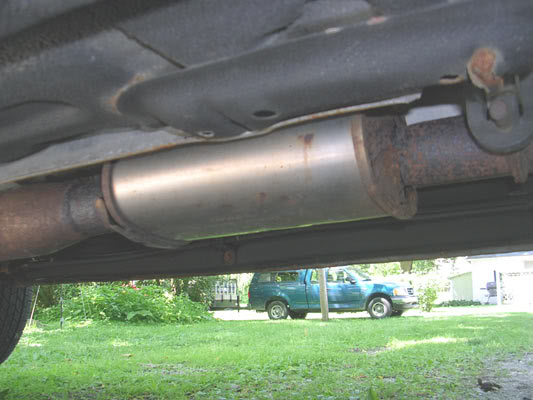
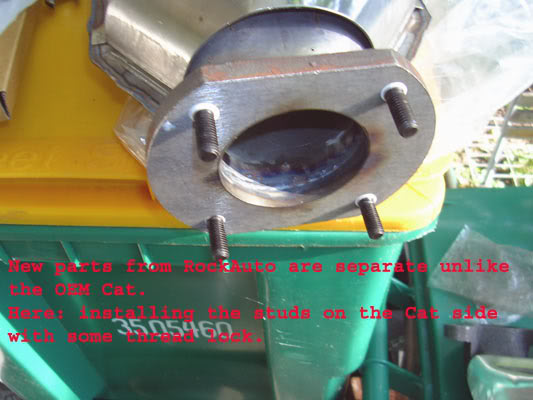
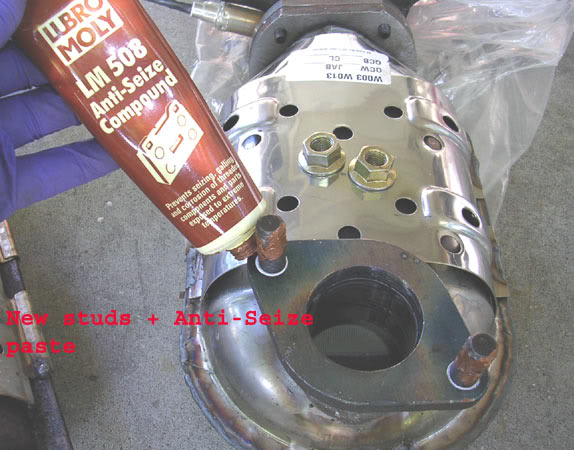
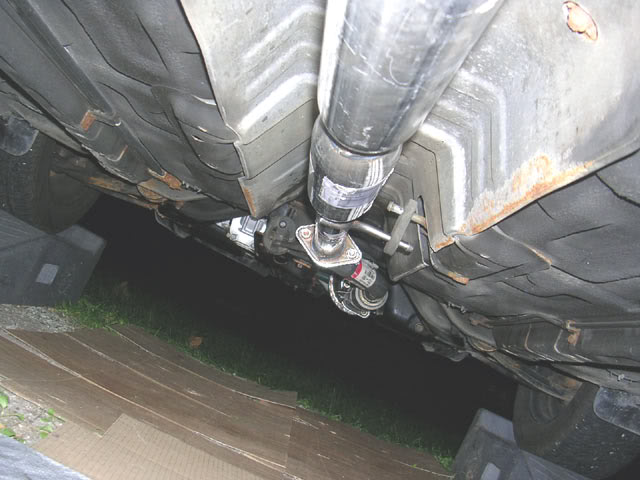
5) Start assembly the new parts, use some anti-seize paste, and get them in the car.

I was LUCKY, the two nuts didn't put out too much opposition so I was able to remove them:
--
I separated the Cat from the Flex pipe (with some prying involved as the two flanges were weld together due to rust), and dropped down (yepp, in between the radiator fans and engine block) the cat + manifold with some careful angling and tks to the PS Pump being out of the way:
--
4) I didn't bother with the nuts connecting the flex pipe to the resonator (intermediary) pipe as it was too rusted, and concentrated directly on the Resonator-Muffler flange.
It really took 3-4 hours to wrestle those two nuts, as they were really rusted. Actually one of them from a 3/4 profile thinned out to about 5/8.... I broke a 5/8 6-point socket which I had to tap in to get a grip. I had to go to the store and get a 12-pt socket, which I didn't have.
Finally, finally after so much wrestling (the position is also so difficult without having the car higher over your head) I was able to remove both bolts and drop the whole resonator-flex pipe assembly.
--
5) Start assembly the new parts, use some anti-seize paste, and get them in the car.
#3
08-03-2009, 01:19 AM


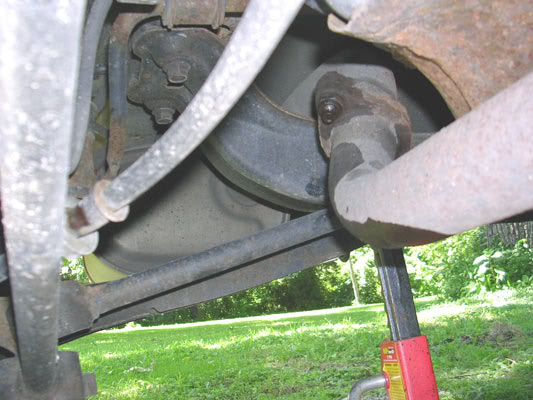
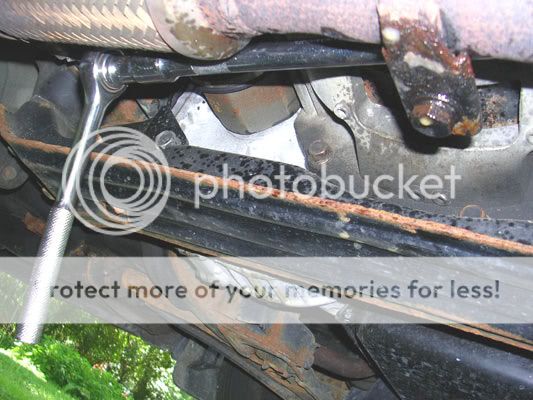
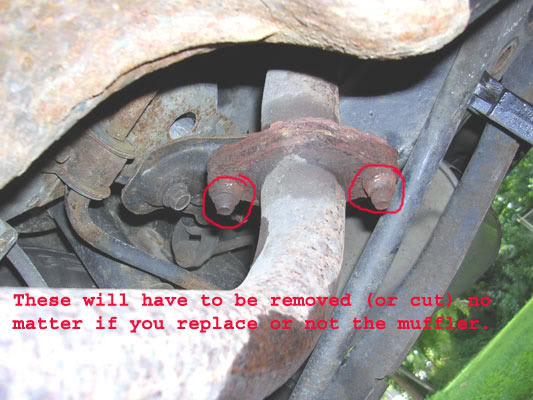
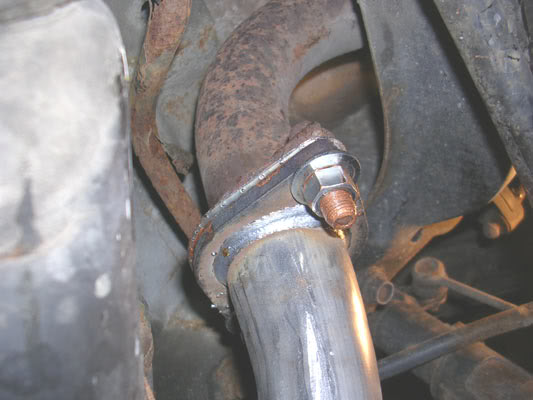
And the last two bolts, by the muffler's connecting flange:
I'm pretty sure I saved at least $ 350-400 over going to any kind of shop (indie or dealer) to replace all these 4 parts.
It is a fun project (ok, minus the headache with the stubborn rusted flange nuts), and I'm pretty sure anyone mechanically inclined should be able to do it, provided the need arises.
Good luck and enjoy (if you ever need this mini-guide).
John.


Thread
Thread Starter
Forum
Replies
Last Post
00ElantraGLS
PRIVATE For Sale / Trade Classifieds
1
05-24-2012 09:18 PM
ksojerio
Private 'Wanted' Classifieds
3
04-30-2012 10:22 AM

